How to add a custom model?
In some cases you may be needing to add new models to your application in order to cover unique business needs. The process of extending Sylius with new entities is simple and intuitive.
As an example we will take a Supplier entity, which may be really useful for shop maintenance.
1. Define your needs
A Supplier needs three essential fields: name, description and enabled flag.
2. Generate the entity
Symfony, the framework Sylius uses, provides the SymfonyMakerBundle that simplifies the process of adding a model.
Warning
Remember to have the SymfonyMakerBundle imported in the AppKernel, as it is not there by default.
You need to use such a command in your project directory.
With the Maker Bundle
php bin/console make:entity
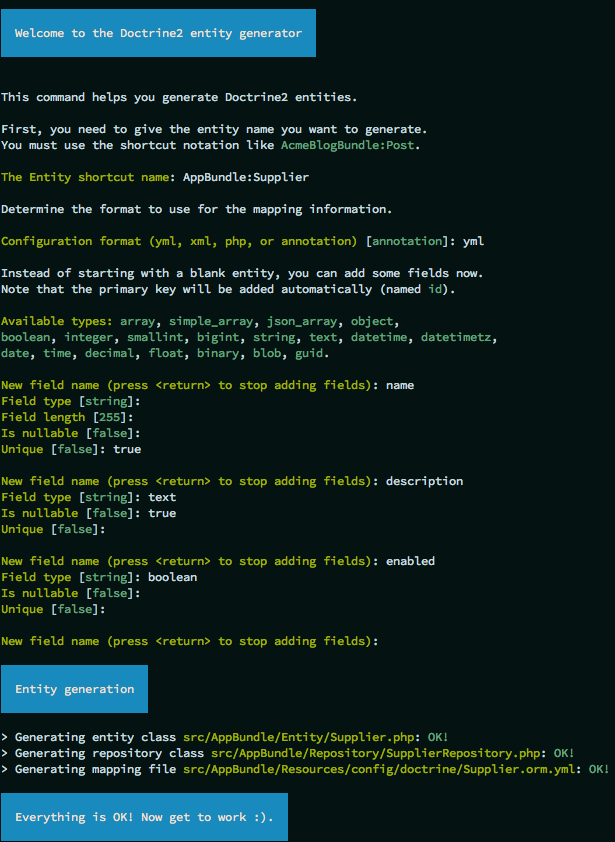
The generator will ask you for the entity name and fields. See how it should look like to match our assumptions.

Note
You can encounter error when generating entity with Maker Bundle, this can be fixed with Maker bundle force annotation fix

3. Update the database using migrations
Assuming that your database was up-to-date before adding the new entity, run:
php bin/console doctrine:migrations:diff
This will generate a new migration file which adds the Supplier entity to your database. Then update the database using the generated migration:
php bin/console doctrine:migrations:migrate
4. Add ResourceInterface to your model class
Go to the generated class file and make it implement the ResourceInterface:
<?php

namespace App\Entity;

use Sylius\Component\Resource\Model\ResourceInterface;

class Supplier implements ResourceInterface
{
    // ...
}
5. Change repository to extend EntityRepository
Go to generated repository and make it extend EntityRepository and remove __construct:
<?php

namespace App\Repository\Supply;

use App\Entity\Supply\Supplier;
use Doctrine\Persistence\ManagerRegistry;
use Sylius\Bundle\ResourceBundle\Doctrine\ORM\EntityRepository;

class SupplierRepository extends EntityRepository
{
    // ...
}
6. Register your entity as a Sylius resource
If you don’t have it yet, create a file config/packages/sylius_resource.yaml.
# config/packages/sylius_resource.yaml
sylius_resource:
    resources:
        app.supplier:
            driver: doctrine/orm # You can use also different driver here
            classes:
                model: App\Entity\Supplier
                repository: App\Repository\SupplierRepository
To check if the process was run correctly run such a command:
php bin/console debug:container | grep supplier
The output should be:

7. Define grid structure for the new entity
To have templates for your Entity administration out of the box you can use Grids. Here you can see how to configure a grid for the Supplier entity.
# config/packages/_sylius.yaml
sylius_grid:
    grids:
        app_admin_supplier:
            driver:
                name: doctrine/orm
                options:
                    class: App\Entity\Supplier
            fields:
                name:
                    type: string
                    label: sylius.ui.name
                description:
                    type: string
                    label: sylius.ui.description
                enabled:
                    type: twig
                    label: sylius.ui.enabled
                    options:
                        template: "@SyliusUi/Grid/Field/enabled.html.twig"
            actions:
                main:
                    create:
                        type: create
                item:
                    update:
                        type: update
                    delete:
                        type: delete
8. Define routing for entity administration
Having a grid prepared we can configure routing for the entity administration:
# config/routes.yaml
app_admin_supplier:
    resource: |
        alias: app.supplier
        section: admin
        templates: "@SyliusAdmin\\Crud"
        redirect: update
        grid: app_admin_supplier
        vars:
            all:
                subheader: app.ui.supplier
            index:
                icon: 'file image outline'
    type: sylius.resource
    prefix: /admin
10. Check the admin panel for your changes
Tip
To see what you can do with your new entity access the https://localhost:8000/admin/suppliers/ url.
